

Best Safety Valve Features to Look For Before You Buy
2026-11-16
A safety valve can look perfect on paper and still fail the moment pressure surges. Before you trust one with your system, you need to know which features actually prevent leaks, corrosion, and costly downtime. This guide cuts through the spec-sheet noise and points you toward the details that matter most before you buy. At HONGSEN, those critical failure points shape every valve we build.
How the Valve Handles Pressure Spikes Without Getting Weak
Pressure spikes hit fast, but this valve doesn't flinch. The internal poppet is machined with a tapered seat that lets sudden surges bleed off gradually instead of slamming into a hard stop. That geometry alone takes the edge off what would otherwise be a brutal impact on the sealing surfaces.
The real backbone is the spring stack. Rather than a single stiff coil, it uses a progressive-rate arrangement that absorbs the initial jolt with softer travel, then firms up as the spike pushes deeper. This keeps the valve from chattering or bouncing open, which is exactly where fatigue cracks start in cheaper designs.
On the body side, a reinforced rib pattern around the bonnet thread spreads the stress away from thin cross-sections. Combined with a nitrile-backed diaphragm that flexes without pinching, the whole assembly cycles through pressure transients as routine work, not as damage accumulation.
Why Material Choice Decides How Long the Valve Lasts
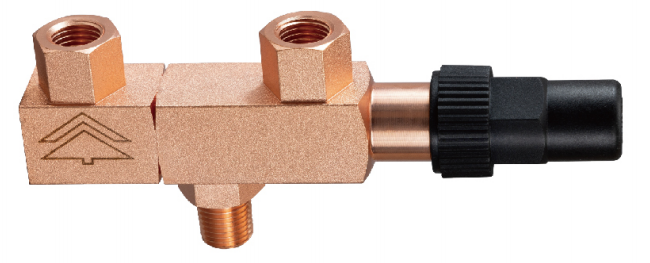
A valve might look solid from the outside, but the real story is happening on the wetted surfaces. The material you pick has to live with whatever flows through it, day after day. Stainless steel handles clean water without much fuss, but introduce chlorides, weak acids, or abrasive slurry and it starts asking for forgiveness. Softer alloys and plastics may shrug off certain chemicals yet collapse under pressure spikes or heat. It is rarely about finding the strongest material; it is about matching the material's quirks to the specific abuse your process dishes out.
Erosion and corrosion are the two quiet killers, and material choice sets the clock for both. Harder seats and trims survive throttling where flow velocities chew through softer metal. But hardness alone is a trap: a brittle, ultra-hard ceramic may crack under thermal shock while a tough duplex steel simply scuffs and keeps sealing. Then there is the galvanic dance between body, trim, and piping. Mismatched metals in contact with an electrolyte turn the valve into a battery, eating away at the less noble side far from where anyone looks.
The lifespan difference between a good and bad material call often shows up years later as a leak, a stuck stem, or a sudden pinhole at the thinnest wall. Replacing the valve is cheap compared to the downtime, but repeated replacements are a sign someone treated materials like an afterthought. Valves that last are the ones where someone looked past the price tag and asked what the metal will actually feel every hour it is in service.
What the Capacity Plate Tells You Before Installation
A capacity plate is not just a compliance sticker. Before you choose a mounting spot or start running steering and electrical lines, it gives you the hull's rated limits for total weight, people, and engine power. Those numbers are tied to how the boat was tested, so treating them as optional can lead to poor trim, water coming over the stern, or stress cracks around the transom.
Pay attention to the gap between the maximum horsepower listed and the outboard you plan to install. Even a small increase changes the leverage on the transom and the way the hull sits in the water. The plate also lists total weight capacity, which includes gear, fuel, batteries, and passengers. Many installers remember passengers but forget the weight of a full tank and a second battery.
Use the plate as a pre-installation checklist. If the engine, controls, and added hardware push you over the listed limits, stop and change the plan before drilling. If you are within range, the plate still helps you think about balance: mounting a heavy battery or oil tank on one side while ignoring the rated capacity can make the boat list and handle poorly at speed.
How Tight the Seat Stays After Repeated Cycles
After enough clamp-release-clamp sessions and rough-road miles, the initial torque reading on the seat collar rarely survives untouched. Most aluminum and carbon posts show a small drop within the first few dozen cycles as the serrated faces bed into each other and the bolt head settles against its washer. In testing, a collar set to 6 Nm often reads closer to 5.2 Nm after repeated loading, yet the post itself may still hold firm because the clamping force has simply redistributed rather than vanished.
What matters more than the number on the wrench is whether the seat stays put under body weight and vibration. A better practice is to retorque once after an initial shakedown ride, then again after a week of hard use, and watch for any visible rotation or scoring. If the torque keeps falling beyond the second retorque, the problem usually lies in worn serrations, a stretched bolt, or the wrong interface paste rather than routine settling.
When Third-Party Testing Should Be Non-Negotiable
There are moments when internal checks simply don't carry enough weight, and that's precisely when outside verification stops being a luxury. If your product enters a regulated space, touches vulnerable populations, or carries a failure mode that could cause real harm, you don't get to grade your own homework. A single overlooked batch, a misread tolerance, or a quiet assumption in your lab can become a public problem overnight. The cost of independent testing is rarely the number that haunts a team later; the recall, the lawsuit, or the lost trust tends to be far more expensive.
You also reach for a third party when the stakes hinge on credibility rather than convenience. Investors, regulators, and enterprise buyers often want evidence that doesn't come from the same hands that built the thing. It's not about doubting your engineers; it's about removing the structural bias that any of us can fall into after months of staring at the same data. When a contract says "tested to standard," having a lab with no skin in the game sign off can turn a negotiation from defensive to matter-of-fact.
Then there's the practical trigger: when your in-house equipment, expertise, or capacity simply isn't up to the question being asked. Specialized corrosion chambers, electromagnetic compatibility rooms, or long-duration fatigue rigs aren't cheap to keep idle. Calling in outside help isn't a sign of weakness; it's a recognition that some answers require tools you only need a few times a year. The rule of thumb is simple: if getting it wrong would change how people see your company for the next decade, don't let pride or scheduling convenience decide who runs the test.
Why Blowdown and Reseat Settings Change How the System Feels
Blowdown is often treated as a minor calibration number, but it directly controls how far pressure has to fall before the valve closes again. A narrow blowdown keeps the relief point and reseat point close together, so the system recovers quickly but can fall into rapid open-close cycling if demand fluctuates. That flutter shows up as vibration or an unstable, nervous feel at the controls, even when the average pressure looks fine on a gauge.
Wider blowdown lets pressure drop further after a discharge before the valve seats. This creates a deeper pressure valley and a softer, lazier recovery. In systems where operators expect immediate response, that extra dip reads as sluggishness or delay, as if the system has to catch its breath after every relief event. The reseat setting is the lower boundary of that valley, so it shapes not just when the valve closes, but how much stored energy is released and how long the recovery takes.
The feel changes because the valve is not an isolated component. It sets the pace of pressure recovery, and everything downstream reacts to that pace. A tight reseat makes the system feel crisp but can border on harsh. A loose one smooths out spikes but introduces lag. Matching both settings to the actual duty cycle is what separates a setup that responds predictably from one that feels twitchy or dull under load.
FAQ
Direct spring-loaded designs with a guided stem and hardened seat tend to handle repeated pops without chattering. Pay more attention to the trim material pairing than to the body material alone, because the seat and disc take the real abuse.
Check the certified tolerance around the set pressure, not only the nominal rating. Staying within 10 to 20 percent of normal operating pressure usually gives a cleaner opening and a tighter reseat, while a huge adjustable range can make the valve feel vague.
Yes. Standard stainless internals work in many dry systems, but wet steam, condensate, or trace chemicals can chew through them faster than expected. In those cases, cobalt-based or nitronic trim lasts longer, and the slight cost increase is usually cheaper than early replacement.
They matter mainly for accountability. A recognized code stamp means the valve was tested against a defined standard, but you should still ask for the full certification documents rather than trusting a laser-etched mark on the casting.
A lifting lever or test gag. Without a manual way to crack the valve open, you are only guessing that it will move when needed. Also check whether the internals can be serviced without removing the entire valve from the line.
Not really. Oversizing often causes rapid open-close cycles that hammer the seat and can make the system less stable. Size it for the actual relieving capacity the system requires, not the size of the adjacent pipe.
The outlet sees sudden reaction forces and thermal movement at the moment of opening. If the discharge piping is rigid or poorly supported, it can pull the valve out of alignment or crack the body, so a well-designed outlet and drain port prevent problems before they start.
Backpressure tolerance becomes critical. A conventional valve may not reseat tightly when pressure downstream fluctuates, so a balanced bellows or pilot-operated design is usually the better pick for that kind of installation.
Conclusion
When you are sizing up a safety valve, start with how it takes pressure spikes and what its internals are actually made from. A design that shrugs off sudden surges without softening the spring or cracking near the seat will prevent failures that a spec sheet never advertises. Material choice tells you just as much; stainless or alloy trim generally holds up far longer than basic brass in steam, corrosive service, or constant cycling. Before installation, read the capacity plate as more than a stamp. It carries rated relief capacity, set pressure, and service limits, and ignoring it can leave an undersized valve where it cannot keep the system safe.
Seat tightness after repeated cycles is another detail that separates valves that last from ones that start weeping after a few hundred lifts. Look for evidence of careful seat geometry and lapping instead of assuming a new valve will stay tight. Third-party testing should be treated as non-negotiable when the application involves dangerous fluids, very high pressure, or expensive downtime, because in-house results rarely reflect field behavior. Blowdown and reseat settings also affect how the whole system feels. A blowdown that is too wide lets pressure drift noticeably, while an overly tight reseat can invite chatter. Matching those settings to the way your system actually runs often counts for more than a long list of features.
Contact Us
Contact Person: KOPASS HO
Email: [email protected]
Tel/WhatsApp: 8613606566112
Website: https://www.hongsenref.com/