

Custom Leather Rivets for Durable and Stylish Leather Projects
2026-09-05
Nothing changes the feel of a leather piece faster than the hardware you choose. If you've been hunting for rivets that won't snap, scratch, or clash with your design, custom leather rivets from Kingming are worth a close look. They're made for more than just holding layers together—they add the kind of detail that makes a project feel intentional. In this post, we'll break down why the right rivet matters and how to pick options that stay durable and look sharp.
The Real Difference Custom Rivets Make on a Finished Piece
Most people never register why one leather jacket looks sharper than another until they spot the rivets. Custom rivets shift the eye from “standard hardware” to a deliberate detail. The diameter, head shape, and finish can be tuned to match the surrounding material, so the rivets stop looking like off-the-shelf parts and start reading as part of the original design.
There’s also a tactile payoff that photographs rarely capture. A hand-set custom rivet with a low-profile dome and a lightly burnished edge feels different under the thumb than a mass-produced snap. That small difference adds up across a bag flap or a cuff, giving the whole piece a sense of intention that standard fasteners simply don’t carry.
Scale matters more than most makers expect. Slightly reducing the rivet head size on a thin leather panel, or choosing a matte black oxide against oxblood dye, changes how the piece reads from across a room. Custom rivets allow that kind of fine-tuning, which is why two finished pieces with identical patterns can still look leagues apart.
Picking Rivets That Can Take Daily Wear and Tear
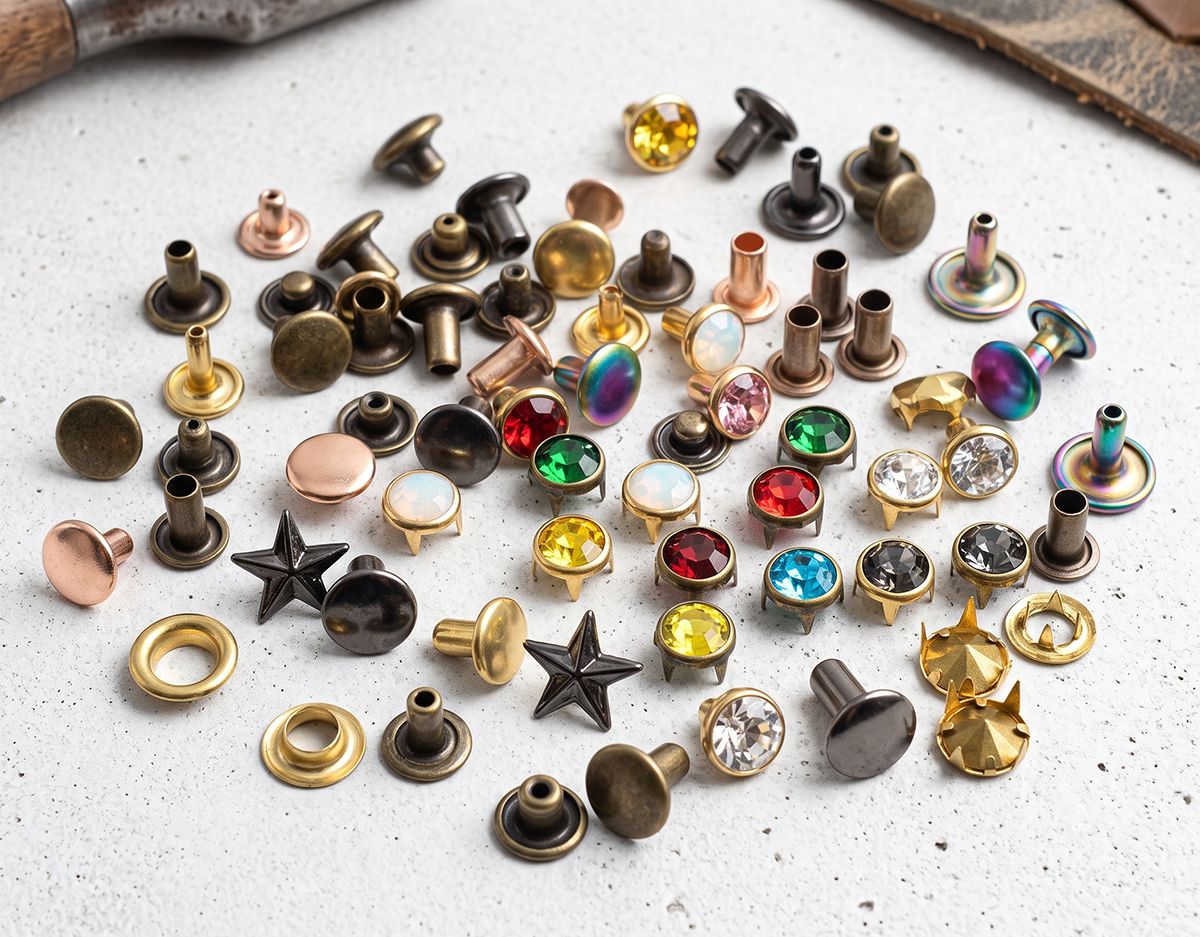
Daily wear hits rivets harder than most people expect, whether they're on a favorite pair of jeans, a leather bag, or a piece of outdoor gear. The first thing to check is material: stainless steel and solid brass hold up far better than cheap zinc alloys or aluminum when they're constantly rubbed, pulled, and exposed to moisture. A heavier gauge shank also makes a noticeable difference—thin, hollow rivets tend to loosen or deform after just a few months of regular use.
Beyond the metal itself, pay attention to how the rivet is set. Tubular and semi-tubular rivets are popular for leatherwork because they flare cleanly, but they need a proper backing washer to prevent the hole from stretching over time. For fabric that flexes constantly, look for rivets with a wider head or a burr on the back side; this spreads the load and stops the material from tearing around the rivet.
Finally, if the item will see sweat, rain, or washing, choose a rivet with corrosion resistance built in—think coated brass, nickel-plated steel, or marine-grade stainless. A rivet that looks fine on day one but rusts after a few washes is a false economy. Test a sample on scrap material first to see how it handles bending and moisture before committing to a whole batch.
Simple Tricks for Setting Rivets Without Damaging the Hide
Before you reach for a hammer, take thirty seconds to check the rivet post length against your leather stack. A post that sits too proud will fold over instead of mushrooming cleanly, and that folded edge is what chews up the grain. Trim the post until it only extends about 1/16 inch past the surface. If you set rivets often, keep a small pair of flush cutters on the bench just for this job.
Put a scrap of suede or thin belt leather between your setter and the rivet head. The cushion stops the steel from biting into the hide when you strike, especially on softer leathers like lambskin or deerskin. Press the setter down firmly before the first tap so it cannot skate sideways. A few light taps beat one hard blow; you are trying to roll the post, not flatten it in one shot.
If the back side of the rivet will sit against finished leather, swap the standard anvil for a polished doming block. Set the post with gentle taps starting at an angle, then work straight down as it starts to curl. When the rivet stops feeling springy under the hammer, stop striking. Over-setting is the fastest way to leave a permanent ring-shaped dent in the hide.
How to Pair Rivet Finish with Leather Tone for a Polished Look
Pairing rivet finish with leather tone relies on contrast before anything else. Light caramel or tan hides take on a crisp, clean feel when you set them against polished nickel or chrome rivets. Deep browns and blacks, on the other hand, warm up considerably with antique brass or copper. For medium oak or cognac shades, matte black or heavily oxidized nickel creates a subtle modern lift that never competes with the leather itself.
Consider the overall mood you are after. A smooth, formal bag benefits from rivets that mirror the hardware elsewhere, say polished silver on pale grey leather. For a more rugged or heritage look, let the rivet finish sit a touch darker or more textured than the leather. It also helps to line up edge paint and stitching with the rivet tone; when those small details agree, the whole piece reads as intentional rather than thrown together.
Why Spacing and Placement Matter More Than You’d Think
Most people assume a cramped shelf or a cluttered corner is just an aesthetic nuisance. But the distance between objects—and where they sit in a room—quietly shapes how you move, breathe, and even think. Tight gaps force you to twist sideways or hold your elbows in, while a clear path lets your shoulders drop and your pace slow. That shift isn't subtle once you notice it.
Placement works the same way. A chair angled toward a window pulls your gaze outward, while one facing a blank wall narrows your focus inward. Objects placed at eye level demand attention; those tucked near the floor recede into the background. These choices aren't decorative—they're functional. They decide what you reach for first, where you pause, and which parts of a room actually get used.
What surprises most people is how little change it takes. Moving a lamp six inches to the left can stop the glare from bouncing off a mirror. Leaving a hand's width between a sofa and the wall makes the whole seating area feel less like a waiting room. You don't need more square footage—just a sharper eye for the spaces between things.
Common Rivet Mistakes That Weaken Even the Best Leather
Most rivet failures on leather come down to one thing: the hole is already too big before the rivet ever goes in. If you can slide the post through with no friction, the leather will stretch around it and start to wobble within weeks. Use a punch that's one size smaller than the rivet post, then ream it slightly if needed. The leather should grip the post like a firm handshake, not a loose sleeve.
Another common mistake is hammering the rivet like you're driving a nail. Leather isn't wood. A few sharp blows can distort the cap, crack the finish, or smash the leather fibers so badly that the rivet sits in a compressed crater. Set rivets with a proper setter and a dead-blow mallet, using controlled taps. Check the back side after the first few hits; if you see the post peening over unevenly, stop and adjust your angle before it's too late.
And don't skip the washer on the back side, especially for anything that will flex or bear weight. That small metal disc spreads the load across a wider area and keeps the rivet from pulling through the leather like a button through a worn buttonhole. If your project will see daily use, a backup washer isn't optional.
FAQ
They come in post lengths from 3mm up to 12mm, and you can stack washers to fine-tune the grip, so everything from thin garment leather to heavy belt blanks works without crushing the fibers.
A basic rivet setter and mallet will do for most jobs. The posts have a slight taper that centers the cap so you get a clean, even clinch instead of a lopsided mushroom.
Yes, you're not locked into raw metal. Choose from antique brass, nickel, matte black, or hand-burnished copper tones, and each finish is sealed to resist tarnish and fingerprints.
The shafts are solid and the burrs lock tight, so they don't wiggle loose on bags, dog collars, or straps. The plating won't flake off after a few rainstorms, and the base metal won't rust through.
The heads have a slightly deeper dome and a hand-polished edge, so they catch light without looking machine-perfect. You can also mix head diameters and post lengths in one order, which is hard to find in pre-packed sets.
Yes, we do low-volume custom stamping with a single steel die. The impression is pressed, not laser-etched, so it keeps its depth even after years of wear.
For a medium tote or satchel, 12 to 20 rivets usually covers stress points and decorative spacing. If you're reinforcing straps or adding a full rivet border, 30 to 40 is safer so you don't stall mid-build.
Conclusion
Custom leather rivets do far more than hold layers together—they become a defining feature that elevates a simple project into a piece with real character. The right rivets add both strength and visual interest, turning functional hardware into a deliberate design choice that catches the eye and withstands daily use. Choosing rivets that can handle constant friction and stress means looking beyond surface looks to solid brass or copper with capped backs, which resist bending, popping, or scratching the hide over time. Setting them properly matters just as much: use a sharp punch for clean holes, place a soft mallet on a firm anvil, and strike with controlled taps to avoid crushing the leather grain or leaving ugly tool marks on the surface.
Pairing the rivet finish with the leather tone creates a polished, intentional look—antique brass warms up rich browns, while nickel or black oxide adds contrast to lighter or dyed leathers. Spacing and placement shape the whole piece: rivets set too close weaken the material between them, too far apart leaves edges prone to lifting. Common failures come from using hollow or plated rivets that snap under load, hammering directly on finished leather without a protective scrap, or skipping a test piece before committing to the final hide. By paying attention to these small but critical details, custom rivets become the quiet backbone of a project that not only lasts for years but also looks better every time it’s picked up.
Contact Us
Contact Person: Jamie Zeng
Email: [email protected]
Tel/WhatsApp: +86 13728219269
Website: https://www.kmhardware.com