
A Step-by-Step Guide to Installing a Heavy-Duty Sliding Door Wheel Kit
2024-12-25
Installing a heavy-duty sliding door wheel kit can seem like a daunting task, especially for first-timers. However, with the right tools and guidance, the process is straightforward and manageable. This blog walks you through the installation process and highlights the tools you’ll need to get the job done efficiently.
What Is a Heavy-Duty Sliding Door Wheel Kit?
A heavy-duty sliding door wheel kit is designed to support and guide the movement of sliding doors, typically in shower rooms. These kits are built to handle heavier glass panels and provide a smooth, durable sliding mechanism. They are perfect for modern bathroom designs requiring reliable and robust solutions.
Tools Required for Installation
Before starting the installation, gather the following tools:
1. Screwdrivers (Phillips and Flathead): For loosening and tightening screws.
2. Allen Wrenches: Often required to adjust or secure components in place.
3. Drill with Bits: To make new holes if necessary or adjust pre-existing ones.
4. Measuring Tape: Ensures accurate alignment and placement.
5. Spirit Level: To maintain the correct orientation and prevent uneven sliding.
6. Safety Gear: Gloves and safety glasses to protect your hands and eyes.
7. Rubber Mallet: For gently tapping components into position without damaging them.
8. Lubricant (Optional): Helps with smoother wheel movement during initial setup.
Installation Steps of Heavy-Duty Sliding Door Wheel Kit
1. Prepare the Area:
- Remove the existing door and hardware if upgrading.
- Clean the mounting area to ensure proper adhesion and alignment.
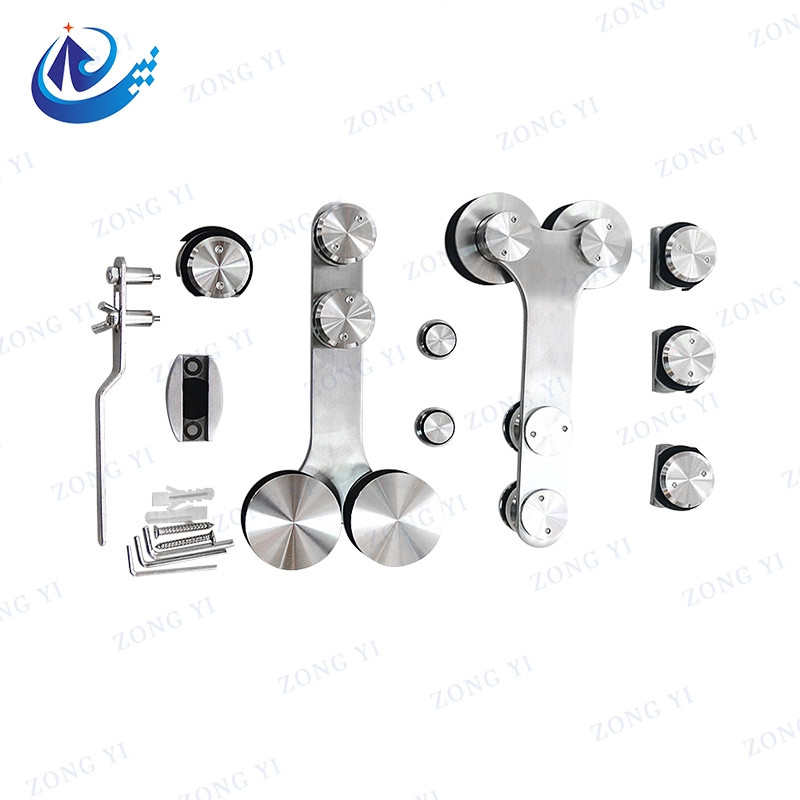
2. Inspect the Kit Components:
- Verify that all components, such as wheels, brackets, and screws, are included and undamaged.
3. Install the Upper and Lower Tracks:
- Attach the tracks to the designated spots using screws or adhesive. Use a spirit level to ensure they are perfectly aligned.
4. Attach the Wheels to the Door:
- Secure the wheels to the door panel, following the manufacturer’s instructions. Ensure they are tightly fastened.
5. Position the Door:
- Carefully lift the door and place the wheels into the upper track. Align the lower wheels with the bottom track.
6. Test the Sliding Mechanism:
- Slide the door back and forth to ensure smooth operation. Adjust the wheels or tracks if necessary.
7. Secure and Finalize:
- Tighten all screws and make final adjustments. Apply lubricant if needed to enhance smoothness.
Tips for a Successful Installation
- Double-check measurements before drilling.
- Work slowly and methodically to avoid damaging components.
- Seek assistance if handling heavy glass panels.
By following these steps, you can achieve a professional-quality installation with minimal hassle.